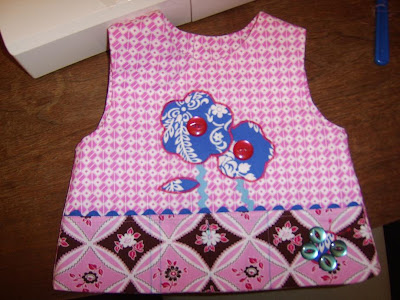
Oh, I forgot to tell you all that the Riley Pattern you saw Kaitlyn model in this post is now available on You Can Make This. So if you would like this lovely top with three pockets along the bottom and these fun pants then pick up the Riley Pattern today. This top has four buttons up the back; don't fret you could us snaps or Velcro. The pockets are the different colored fabric with the ric-rac at the top of it. It's a fun top that I'm considering making Kaitlyn another of in a bigger size so she can wear it over her cast. Oh, the best part about buying this pattern... You can print it out in any of the offered sizes at any time. I know some of you are scratching your heads, but stay with me here. Have you ever bought a paper pattern and cut it out in a size... whatever, and then your child grew and you needed a size larger? Well, you can get a size larger are smaller here (if it's offered) and not have to buy a new pattern. How great is that!!! When I started buying ebooks Kaitlyn was a size 1, but now she is a size 2 and I can keep using them. Also, now that she is in a cast I could make the pattern in a 3 or 4 and it will fit her great.


 I know you have seen the top before, but now you can see the whole package. I never would have guessed the flowers would have been so easy to put on. I'm now inspired to try appliqueing again. My last go at it was maybe a year ago and it was rough. I've heard several people say how to cheat by using coffee filters and other such random items behind the applique'; I say don't be cheap. Buy yourself some sturdy stabilizer! I used the sew in kind, but I didn't actually sew it on. I put it behind my applique' and held it in place. It made the fabric turn so smoothly. When I was done I tore the stabilizer off the back.
 Here's the back. If you don't want to try your hand at button holes you can use snaps or Velcro. If you aren't brave enough to sew in Velcro you can use the iron on kind; I'm not sure how sturdy it would be long term, but you can give it a go.